• Using Linux or BSD as your slave for repetitive editing

    Generating URI on blogsum

    Blogsum is a minimalist & secure CMS which I use. The only problem so far is generating the blog post URL. Generally, it’s a long string of text such as Using Linux or BSD as your slave . However, I cannot use this as a URL generator. One way would be to use javascript or any decent client-side language to do that. What output would I expect ? Something like “Using-Linux-or-BSD-as-your-slave” . That’s a pain to generate manually: I have to copy-paste it, and replace every space with a ‘-“. However there is another way if you’re using Linux or BSD.

    The power of sed

    Some people tend to jump on fully fledged programming languages like Perl, or Python. To me, it’s like using a car to travel 5 meters down the road. The same group of people would probably use google to look up thousand of ways to do the editing. There’s a way to do it on a single line of fairly readable code, using sed. Sed is a tiny piece of software available under all BSD and Linux systems. It stands for “Stream Editor”. Sed can be used to do a lot of complex tasks.

    sed has an easy to remember usage pattern for those kind of tasks that you can type on your terminal:

    echo "Using Linux or BSD as your slave for repetitive editing" | sed 's/ /-/g'

    The output is: Using-Linux-or-BSD-as-your-slave-for-repetitive-editing

    Analysing the command we just typed

    echo just prints whatever you want. echo “XXX”, would print XXX on a terminal. By using echo “XXX XXX” and adding a ‘|’ we take the “XXX”, and send it for further processing. In this case, we send it to sed.

    sed takes the input “XXX XXX”, and applies an operation. In this case the, s means substitute. Now, what do we want to substitute ? We want to substitute the space character, with “-“. we use the / and then the ” ” to tell that to sed. Now, what character do we want to use ? the “-“. We use ‘/’, and then ‘-‘, and another / to terminate the expression. What does the ‘g’ stand for ? By default it will replace only the first occurence of space with “-“. We need to do it for all instances of space. so we use g for “global” replacement. That’s it: we’re done. Linux or BSD just did the grunt work for you 🙂


    (Please don’t hesitate to leave your comments :))
    –Logan

  • Using Linux or BSD as your slave for repetitive editing

    Generating URI on blogsum

    Blogsum is a minimalist & secure CMS which I use. The only problem so far is generating the blog post URL. Generally, it’s a long string of text such as Using Linux or BSD as your slave . However, I cannot use this as a URL generator. One way would be to use javascript or any decent client-side language to do that. What output would I expect ? Something like “Using-Linux-or-BSD-as-your-slave” . That’s a pain to generate manually: I have to copy-paste it, and replace every space with a ‘-“. However there is another way if you’re using Linux or BSD.

    The power of sed

    Some people tend to jump on fully fledged programming languages like Perl, or Python. To me, it’s like using a car to travel 5 meters down the road. The same group of people would probably use google to look up thousand of ways to do the editing. There’s a way to do it on a single line of fairly readable code, using sed. Sed is a tiny piece of software available under all BSD and Linux systems. It stands for “Stream Editor”. Sed can be used to do a lot of complex tasks.

    sed has an easy to remember usage pattern for those kind of tasks that you can type on your terminal:

    echo "Using Linux or BSD as your slave for repetitive editing" | sed 's/ /-/g'

    The output is: Using-Linux-or-BSD-as-your-slave-for-repetitive-editing

    Analysing the command we just typed

    echo just prints whatever you want. echo “XXX”, would print XXX on a terminal. By using echo “XXX XXX” and adding a ‘|’ we take the “XXX”, and send it for further processing. In this case, we send it to sed.

    sed takes the input “XXX XXX”, and applies an operation. In this case the, s means substitute. Now, what do we want to substitute ? We want to substitute the space character, with “-“. we use the / and then the ” ” to tell that to sed. Now, what character do we want to use ? the “-“. We use ‘/’, and then ‘-‘, and another / to terminate the expression. What does the ‘g’ stand for ? By default it will replace only the first occurence of space with “-“. We need to do it for all instances of space. so we use g for “global” replacement. That’s it: we’re done. Linux or BSD just did the grunt work for you 🙂


    (Please don’t hesitate to leave your comments :))
    –Logan

  • Karbonn Sparkle V & Android One

    Android One

    Android One is a label that targets emerging markets. It specifies the minimum hardware requirements that a smartphone must have to be supported for 2 years by Google. This is one of the major opportunities for us in Mauritius. Some of you may think that it’s too good to be true, but it exists, as I got myself an Android One phone !

    Karbonn Sparkle V

    I bought an android-one certified phone from an Indian Manufacturer Karbonn. Mine is the Karbonn Sparkle V. When I got it, It was still on Android 4.4. As soon as I configured the wifi, It offered the possibility to be updated to Android 5.0 . Many high end phones are still shipping with Android 4.4 today without any updates to Android 5.0. sparkle


    • Display size: 4.5 inches
    • CPU: Quad-core 1.3 GHz Cortex-A7
    • Internal memory : 2GB
    • GPU: Mali-400MP2
    • RAM: 1GB
    • Camera (back): 5 MP, 2592 х 1944 pixels, autofocus, LED flash
    • Camera (front): 2MP
    • GSM: 2G, 3G, 4G


    User experience

    Yesterday night, I updated to Android 5.1.1. UX-wise, the phone is very responsive, and snappy. My only complaint would be the lack of internal storage space. I think that 4GB would have been better. Another version of the Sparkle is currently brewing. I hope that Google bumps the hardware specs for the next Android One label. The price is very competitive: Rs 5700-5900 depending on where you buy it. Overall, I’m very happy with my purchase, and I definitely plan to buy another Android One phone at the end of this year.


    Android One firmware

    firmware

    It is worth pointing out that Google offers 2 years of firmware update support. This is fantastic, as I get the equivalent of a Google Nexus phone, at a much more reasonable price. This is the major win for the Android One phones. Unlike manufacturers that tend to ignore firmware updates after 6 month, Google makes a smart move here.


    –Logan

  • Improving NTP security against overflows

    Saving the world … on time !

    ntp_intro

    The Network time protocol is a standard which is used to keep our computer’s time accurate. The science involved in keeping clocks ticking on computers is far more complex than most people would assume.

    As a comparison: The number of lines of code for University of Delaware NTP implementation — which is the most widely deployed NTP software — is slightly less than the source code of Internet Software Consortium’s BIND product. I will spare us the details of the hair-pulling mathematics involved 🙂

    Security record of Delaware NTP

    I do not want to criticise the work of the past NTP developers. I am merely looking at the list of past vulnerabilities:

    • Buffer overflow in crypto_recv()
    • Buffer overflow in ctl_putdata()
    • Buffer overflow in configure()

    So what is a buffer overflow ? Let’s use a picture to illustrate this:

    buffer_overflow

    As we can see here: The attacker keeps putting more sugar in the pan until it literally overflows. In computers, you can do the same thing. You can put more input than the storage location can accept, and you essentially overflow its content to the next adjcent storage location. There’s one difference however: if you are smart, you can use the overflowing “sugar” to take control of the remote computer ! This is one of the classic ways to crack into a remote computer such as an NTP server, a Mac OS X laptop, or even a windows laptop. For geeks, you can put some “magic” in the overflowing sugar that executes “/bin/bash” and you can then run whatever you want on the NTP service.

    Defeating overflows

    I have extended the NTP memory allocator — a manager which is in charge of allocating storage space in live memory — and added an additional function that checks for buffer overflows that occur under certain conditions, namely multiplication. As I said previously, a lot of NTP involves complex mathematical calculations that can lead to vulnerabilities. This defeats an entire class of buffer overflows in NTP. Due to the large number of products that use University of Delaware NTP software, this is a significant step towards improving the Internet Security at large !

    To put it in more simpler terms: We prevent the attacker from overflowing the pan with sugar. We have detectors in place that signal to the chef that something went wrong in the kitchen.

    List of products using University of Delaware NTP software

    I have attempted to list a few well known products which use University of Delaware NTP software. This is by no means, exhaustive:

    • Various CISCO products.
    • RedHat/CentOS Linux.
    • Ubuntu Linux.
    • Apple Macbooks.
    • And many others


    –Logan

  • Android One camera issue

    Android One camera freeze

    wedding

    While attending a wedding today, I wanted to use my camera to record videos. When I switched to video mode, The application froze. Android reported that it was not able to connect to the camera.

    Dark Powers of Linux to the rescue

    Since Android was running a Linux kernel, I knew from experience that this was very likely a device driver module. Of course, since I did not have full access to the android kernel message log, I knew that it was based on my instinct 🙂

    I still wanted to record the speeches about the responsibilities of Marriage from the gentleman who took his time to lecture the newly wed couple. So, I knew that I had to find a way to reset the camera. My idea was since I had switched to video mode before it froze, it probably remained in that state. I quickly killed the application, and reloaded it . Unsurpringly, it started directly in recording mode. I just had to click on record, and it did the trick.

    My theory is that switching back and forth from camera to photo mode causes the driver to hang up with the Android kernel. Since my phone is supported by Google, I sent a report to them on the phone itself, including how to reproduce it 🙂

    Google Android One rocks

    Thanks to the support from Google, I can send bug reports to them, as the phone is supported for 2 years. Unlike other phone manufacturers, it’s much better in my humble opinion.


    –Logan

  • Upgrade to Xubuntu 15.04 – Vivid Vervet

    Upgrade to Xubuntu 15.04 - Vivid Vervet

    Running an operating system like Ubuntu or any of its derivates, like ie. Xubuntu, comes with some nice treats (and threats?). One of the nice things is that you’ll get a scheduled upgrade approximately every six months. Usually, around April and October of each year. Meaning there are two releases per year resulting in those version numbers [Year].04 and [Year].10. Also, ever two years the April edition of Ubuntu is classified as a Long-Term Support (LTS) version which keeps an extended period of time. A nice touch and surely interesting for professional installations of Ubuntu but eventually not too practical for the daily use at home or when you’re interested in latest versions.

    Preparing the system

    These steps are the same every time you decide to upgrade to the latest release. Eventually, you might be interested to update older installation and have a read here: 

    In general, you should have a look at the official upgrade documentation of Ubuntu. Next, get your recent system up-to-date before you consider to upgrade. Also, take care that there are no pending partial upgrades or packages on hold. This might have a negative impact on the installation process of the newer packages. So, before you think about upgrading you have to ensure that your current system is running on the latest packages. This can be done easily via a terminal like so:

    $ sudo apt-get update && sudo apt-get -y dist-upgrade --fix-missing
    Upgrade to Xubuntu 15.04 - Vivid Vervet

    Next, we are going to initiate the upgrade itself:

    $ sudo update-manager

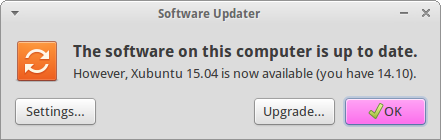
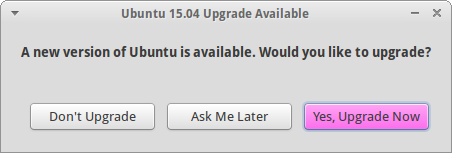
    As a result the graphical Software Updater should inform you that a newer version of Ubuntu is available for installation.
    Upgrade to Xubuntu 15.04 - Vivid Vervet

    Ubuntu’s Software Updater informs you whether an upgrade is available

    Running the upgrade

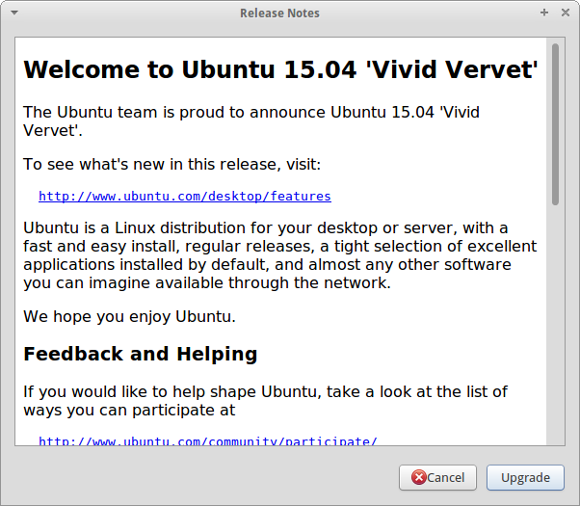
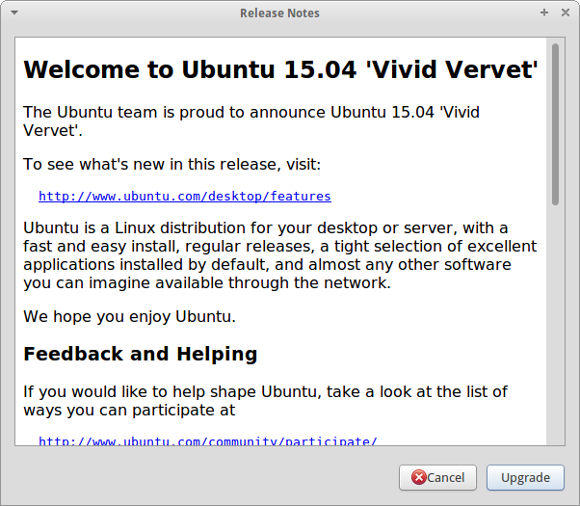
    After clicking ‘Upgrade…’ or ‘Yes, Upgrade Now’ you will be presented with information about the new version.
    Upgrade to Xubuntu 15.04 - Vivid Vervet

    Details about Ubuntu 15.04 (Vivid Vervet)

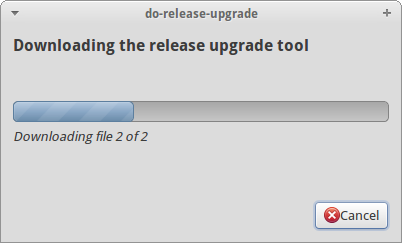
    Simply continue with the procedure and your system will be analysed for the next steps.
    Upgrade to Xubuntu 15.04 - Vivid Vervet

    Analysing the existing system and preparing the actual upgrade to 15.04
    Upgrade to Xubuntu 15.04 - Vivid Vervet

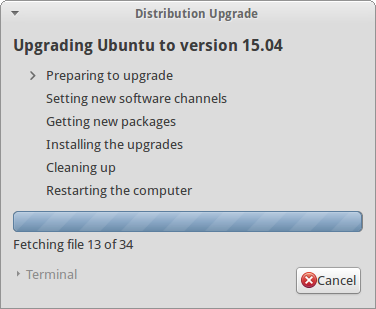
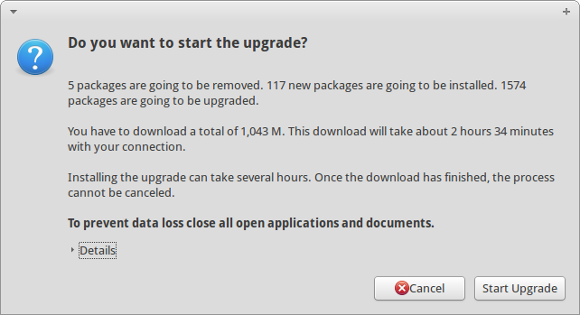
    Next, we are at the point of no return. Last confirmation dialog before having a coffee break while your machine is occupied to download the necessary packages. Not the best bandwidth at hand after all… yours might be faster.
    Upgrade to Xubuntu 15.04 - Vivid Vervet

    Are you really sure that you want to start the upgrade? Let’s go and have fun!

    Anyway, bye bye Unique Unicorn and Welcome Vivid Vervet!

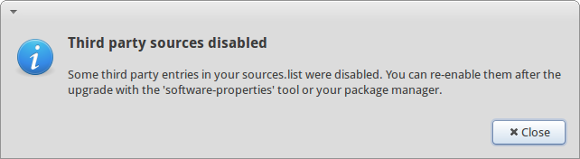
    In case that you added any additional repositories like Medibuntu or PPAs you will be informed that they are going to be disabled during the upgrade and they might require some manual intervention after completion.
    Upgrade to Xubuntu 15.04 - Vivid Vervet

    Ubuntu is playing safe and third party repositories are disabled during the upgrade

    Well, depending on your internet bandwidth this might take something between a couple of minutes and some hours to download all the packages and then trigger the actual installation process. In my case I left my PC unattended during the night.
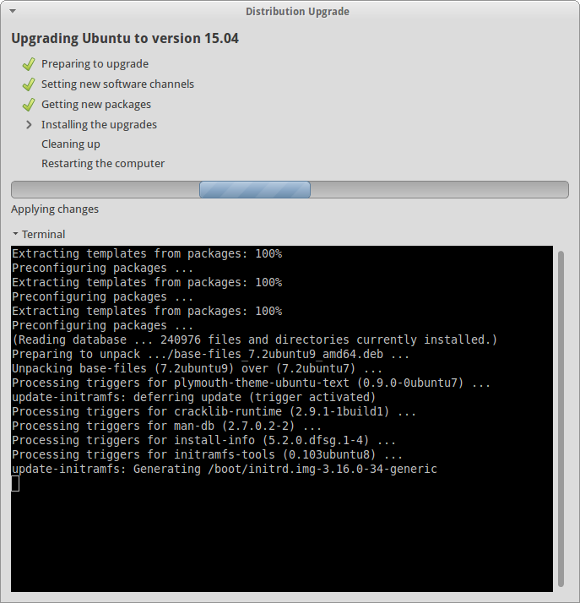
    Upgrade to Xubuntu 15.04 - Vivid Vervet

    At the end Xubuntu will ask you whether you would like to remove old and obsolete packages of the previous version.
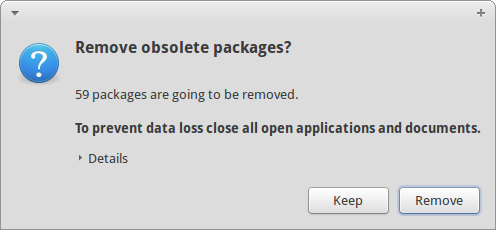
    Upgrade to Xubuntu 15.04 - Vivid Vervet

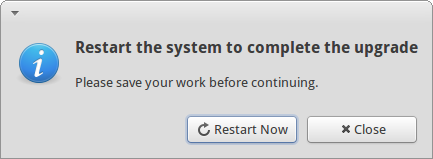
    Time to reboot

    Upgrade to Xubuntu 15.04 - Vivid Vervet

    Finally, it’s time to restart your system and see what’s going to happen… In my case absolutely nothing unexpected. The system booted the new kernel 3.19.0 as usual and I was greeted by a new login screen.

    Honestly, ‘same’ system as before – which is good and I love that fact of consistency – and I can continue to work productively. And also Software Updater confirms that we just had a painless upgrade:
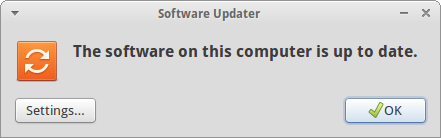
    Upgrade to Xubuntu 15.04 - Vivid Vervet

    System is running Ubuntu 15.04 – Vivid Vervet – and up to date

    See you in six months again… 😉

    Post-scriptum

    In case that you would to upgrade to the latest development version of Ubuntu, run the following command in a console:

    $ sudo update-manager -d

    And repeat all steps as described above.

  • Lets rock with MySQL and MariaDB

    Logo of MariaDB Sealion mascotSome weeks months ago…

    What happens on Facebook

    I saw an announcement made by Ronny on Facebook that he’s about to organise a meeting about MySQL and MariaDB. Well, I have to admit that I didn’t have that much contact with Ronny but I knew that he was involved in the initiation of the Linux User Group of Mauritius (LUGM), and that Ish already mentioned his name a couple of times, mostly because of the inspirational approach and other funny things. Well, long story short. Ronny mentioned that one of his friends will be around on the island for some vacation and that said person agreed to do a session on the history, the (eventual) future and some technical aspects of MySQL and MariaDB. Sounds great and having an expert from abroad doesn’t happen too often…

    Okay, next Ronny was looking for a decent location and I suggested to him that he might his luck at The Flying Dodo Brewery in Bagatelle. In general not a problem but those guys over there speak money and in order to get their side room with some conference aspirations they wouldn’t agree on the usual deal for user groups. Meaning: Room for attendees consuming food & drinks. As I had personal interest in this session to happen, I backed Ronny’s intentions to go forward with it and to let me know in case that there financial constraints to be expected. Running your business provides you with some benefits and allowances. Anyway, there was a little fee for the evening to be paid, and I was glad to cover those expenses through my business: IOS Indian Ocean Software Ltd.

    Lets rock with MySQL and MariaDB

    The “event” was scheduled for the evening hours, and after the official part it was commonly agreed that we are going to leverage the location and have a decent after-meeting session at the brewery. It’s always nice to combine work with pleasure – particularly in that specific order.

    Our presenter, an international consultant for MySQL and MariaDB working at SkySQL AB at that time, named Joffrey Michaie did a great job during the evening. First, he gave us a brief history lesson about the origins of MySQL, then elaborated on the recent purchase event during the last couple of years and went over the actual reasons why MariaDB has been created. Well, Sun and Oracle did a great job to get quite a number of good developers on MySQL as well as the community on their feet. The fork of MySQL into MariaDB is reasonable given that Oracle doesn’t need to support two opposing RDBMS within the same company – astounishingly that’s a very familiar constellation seeing Microsoft SQL Server and Microsoft Visual FoxPro (VFP) in the past. Anyway, approximately 90% (and more) of the original MySQL developers quit their job and went over to a company called SkySQL AB – which is solely temporarily and there had been a press release recently, that it’s now officially MariaDB AB. Monty Widenius had his coup and the core development team is back to its roots.

    And… best of all: MariaDB is an inplace-replacement for MySQL. In case that you’re operating your website or blog on MySQL you can simply install and use MariaDB instead of. It works flawlessly.

    Next, Jojo gave us some corner data about the wide-spread use of MySQL/MariaDB. Actually some big internet companies or better said their websites (like Facebook, SAP, Xing, etc.) are driven by MySQL installations spread over hundreds or even over thousands of machines. Of course, this requires some interesting architecture not only regarding the physical setup of machines and networks but also in terms of storage and replication features. High-availability (HA) is the magical keyword in this case. At a certain size you have to switch towards DB clusters and Joffrey gave us good information about one could setup such clusters using Galera. He also gave us a brief overview of some specialised storage engines available in MySQL/MariaDB which definitely go far beyond the capabilities of the standard types like MyISAM or InnoDB.

    Full screen entertainment for geeks

    The full presentation of a whooping 107 slides is available on SlideShare – Thanks to Joffrey and the LUGM!

    On my side, I have to admit that I was a bit interruptive as I had a good number of questions regarding certain features I’m used to using either VFP or SQL Server. Especially given the fact that I was involved in the software architecture and development of client-server applications that run on roughly 100 instances of SQL Server including different types of data replication. Yes, we did partitioning and the database has a variety of replication scenarios for different tables; including typical master-slave replication but also enhanced 2-way replication. Also dealing with data volumes in 2-digit and even 3-digit regions is not unusual with my clients. And there is quite a difference between writing and running queries against a low amount of records compared to tables with 15+ million records. Not to forget about write and update operations. Patiently, Joffrey took note of my questions and he had very good answers how certain setups and requirements could be solved and handled with MariaDB. One of the interesting topics was the discussion about data types of “uniqueidentifier” versus “UUID” versus “Global Transaction ID (GTID)”. Well, basically they are the same… Whereas SQL Server handles replication based on that specific data type, MySQL or MariaDB remains on dealing with integer-based column data types (comparable to Auto-Increment in SQL Server) – which I find problematic. 

    MariaDB Enterprise Architecture v3.1
    MariaDB is not just the database anymore; it’s a platform for application developers and database administrators

    Anyway, the evening had some interesting chunks of information for me and I enjoyed the whole presentation. Joffrey knows how to keep the audience focused and engaged into the topic. And shamelessly we extending the scheduled 1-hour session by at least 30 minutes or so. Until all questions have been asked and answered. And after all this talking and listening it was time to move over to the social aspects of the evening and to get some refreshments.

    Networking session and future activities

    Later on I managed to have a little smalltalk with Jojo and even though the meeting was under the aegis of the LUGM, I informed him about the existence, goals and intentions of the Mauritius Software Craftsmanship Community (MSCC). Dunno, how he took it but since then we are still in touch on social media networks, and have a chat from time to time. On my part I’m looking forward to the next opportunity to hear about MariaDB from Joffrey – and of course I won’t hesitate to act as a sponsor again.

    Oh, and thanks for the goodies – I really like that black MariaDB 10 T-Shirt.

    Disclaimer: Images are courtesy of MariaDB Corporation Ab. MariaDB is a trademark or registered trademarks of MariaDB Corporation Ab in the European Union and United States of America and/or other countries. MySQL is a trademark of Oracle Corporation Inc.

  • Linux User Group Meta, Annual General Meeting – 12/04/14 12hr @ Lambic

    Members,

    This is to inform you that we shall have our Annual General Meeting held on the 12th of April 2014 at 12hr to 15hr.

    Venue: Lambic Conference Room, 4 St. George Street Port louis

    Map:
    location-plan-black-big
    Agenda:
                1. Reading and Approval of Annual Report by Secretary
                2. Reading of Financial Reports by Treasurer.
                3. President’s speech
                3. Payment of membership fees.
                5. AOB
                4. Election of new board members.
    ps. Venue is already booked so we cannot cancel this.
    pps. A further meeting for executive members to perform handing over, and for executive members to elect office bearers among themselves will be held 3 weeks after this meeting.
    ppps: This meeting is Members ONLY.
    Sincerely,
    Pirabarlen Cheenaramen (Selven)

    Secretary of the Linux User Group Meta.

  • Accessing your web server via IPv6

    Being able to run your systems on IPv6, have automatic address assignment and the ability to resolve host names are the necessary building blocks in your IPv6 network infrastructure. Now, that everything is in place it is about time that we are going to enable another service to respond to IPv6 requests. The following article will guide through the steps on how to enable Apache2 httpd to listen and respond to incoming IPv6 requests.

    This is the fourth article in a series on IPv6 configuration:

    Piece of advice: This is based on my findings on the internet while reading other people’s helpful articles and going through a couple of man-pages on my local system.

    Surfing the web – IPv6 style

    Enabling IPv6 connections in Apache 2 is fairly simply. But first let’s check whether your system has a running instance of Apache2 or not. You can check this like so:

    $ service apache2 status
    Apache2 is running (pid 2680).

    In case that you got a ‘service unknown’ you have to install Apache to proceed with the following steps:

    $ sudo apt-get install apache2

    Out of the box, Apache binds to all your available network interfaces and listens to TCP port 80. To check this, run the following command:

    $ sudo netstat -lnptu | grep "apache2\W*$"
    tcp6       0      0 :::80                   :::*                    LISTEN      28306/apache2

    In this case Apache2 is already binding to IPv6 (and implicitly to IPv4). If you only got a tcp output, then your HTTPd is not yet IPv6 enabled.

    Check your Listen directive, depending on your system this might be in a different location than the default in Ubuntu.

    $ sudo nano /etc/apache2/ports.conf

    # If you just change the port or add more ports here, you will likely also
    # have to change the VirtualHost statement in
    # /etc/apache2/sites-enabled/000-default
    # This is also true if you have upgraded from before 2.2.9-3 (i.e. from
    # Debian etch). See /usr/share/doc/apache2.2-common/NEWS.Debian.gz and
    # README.Debian.gz

    NameVirtualHost *:80
    Listen 80

    <IfModule mod_ssl.c>
        # If you add NameVirtualHost *:443 here, you will also have to change
        # the VirtualHost statement in /etc/apache2/sites-available/default-ssl
        # to <VirtualHost *:443>
        # Server Name Indication for SSL named virtual hosts is currently not
        # supported by MSIE on Windows XP.
        Listen 443
    </IfModule>

    <IfModule mod_gnutls.c>
        Listen 443
    </IfModule>

    Just in case that you don’t have a ports.conf file, look for it like so:

    $ cd /etc/apache2/
    $ fgrep -r -i 'listen' ./*

    And modify the related file instead of the ports.conf. Which most probably might be either apache2.conf or httpd.conf anyways.

    Okay, please bear in mind that Apache can only bind once on the same interface and port. So, eventually, you might be interested to add another port which explicitly listens to IPv6 only. In that case, you would add the following in your configuration file:

    Listen 80
    Listen [2001:db8:bad:a55::2]:8080

    But this is completely optional… Anyways, just to complete all steps, you save the file, and then check the syntax like so:

    $ sudo apache2ctl configtest
    Syntax OK

    Ok, now let’s apply the modifications to our running Apache2 instances:

    $ sudo service apache2 reload
     * Reloading web server config apache2
       ...done.

    $ sudo netstat -lnptu | grep "apache2\W*$"                                                                                              
    tcp6       0      0 2001:db8:bad:a55:::8080 :::*                    LISTEN      5922/apache2   
    tcp6       0      0 :::80                   :::*                    LISTEN      5922/apache2

    There we have two daemons running and listening to different TCP ports.

    Now, that the basics are in place, it’s time to prepare any website to respond to incoming requests on the IPv6 address. Open up any configuration file you have below your sites-enabled folder.

    $ ls -al /etc/apache2/sites-enabled/
    ...

    $ sudo nano /etc/apache2/sites-enabled/000-default

    <VirtualHost *:80 [2001:db8:bad:a55::2]:8080>
            ServerAdmin [email protected]
            ServerName server.ios.mu
            ServerAlias server

    Here, we have to check and modify the VirtualHost directive and enable it to respond to the IPv6 address and port our web server is listening to. Save your changes, run the configuration test and reload Apache2 in order to apply your modifications. After successful steps you can launch your favourite browser and navigate to your IPv6 enabled web server.

    Accessing an IPv6 address in the browser
    Accessing an IPv6 address in the browser

    That looks like a successful surgery to me…

    Note: In case that you received a timeout, check whether your client is operating on IPv6, too.

  • Enabling DNS for IPv6 infrastructure

    After successful automatic distribution of IPv6 address information via DHCPv6 in your local network it might be time to start offering some more services. Usually, we would use host names in order to communicate with other machines instead of their bare IPv6 addresses. During the following paragraphs we are going to enable our own DNS name server with IPv6 address resolving.

    This is the third article in a series on IPv6 configuration:

    Piece of advice: This is based on my findings on the internet while reading other people’s helpful articles and going through a couple of man-pages on my local system.

    What’s your name and your IPv6 address?

    $ sudo service bind9 status
     * bind9 is running

    If the service is not recognised, you have to install it first on your system. This is done very easy and quickly like so:

    $ sudo apt-get install bind9

    Once again, there is no specialised package for IPv6. Just the regular application is good to go.

    But of course, it is necessary to enable IPv6 binding in the options. Let’s fire up a text editor and modify the configuration file.

    $ sudo nano /etc/bind/named.conf.options

    acl iosnet {
            127.0.0.1;
            192.168.1.0/24;
            ::1/128;
            2001:db8:bad:a55::/64;
    };

    listen-on { iosnet; };
    listen-on-v6 { any; };

    allow-query { iosnet; };
    allow-transfer { iosnet; };

    Most important directive is the listen-on-v6. This will enable your named to bind to your IPv6 addresses specified on your system. Easiest is to specify any as value, and named will bind to all available IPv6 addresses during start. More details and explanations are found in the man-pages of named.conf.

    Save the file and restart the named service. As usual, check your log files and correct your configuration in case of any logged error messages. Using the netstat command you can validate whether the service is running and to which IP and IPv6 addresses it is bound to, like so:

    $ sudo service bind9 restart

    $ sudo netstat -lnptu | grep "named\W*$"
    tcp        0      0 192.168.1.2:53        0.0.0.0:*               LISTEN      1734/named     
    tcp        0      0 127.0.0.1:53          0.0.0.0:*               LISTEN      1734/named     
    tcp6       0      0 :::53                 :::*                    LISTEN      1734/named     
    udp        0      0 192.168.1.2:53        0.0.0.0:*                           1734/named     
    udp        0      0 127.0.0.1:53          0.0.0.0:*                           1734/named     
    udp6       0      0 :::53                 :::*                                1734/named 

     Sweet! Okay, now it’s about time to resolve host names and their assigned IPv6 addresses using our own DNS name server.

    $ host -t aaaa www.6bone.net 2001:db8:bad:a55::2
    Using domain server:
    Name: 2001:db8:bad:a55::2
    Address: 2001:db8:bad:a55::2#53
    Aliases:

    www.6bone.net is an alias for 6bone.net.
    6bone.net has IPv6 address 2001:5c0:1000:10::2

    Alright, our newly configured BIND named is fully operational.

    Eventually, you might be more familiar with the dig command. Here is the same kind of IPv6 host name resolve but it will provide more details about that particular host as well as the domain in general.

    $ dig @2001:db8:bad:a55::2 www.6bone.net. AAAA

    More details on the Berkeley Internet Name Domain (bind) daemon and IPv6 are available in Chapter 22.1 of Peter Bieringer’s HOWTO on IPv6.

    Setting up your own DNS zone

    Now, that we have an operational named in place, it’s about time to implement and configure our own host names and IPv6 address resolving. The general approach is to create your own zone database below the bind folder and to add AAAA records for your hosts. In order to achieve this, we have to define the zone first in the configuration file named.conf.local.

    $ sudo nano /etc/bind/named.conf.local

    //
    // Do any local configuration here
    //
    zone "ios.mu" {
            type master;
            file "/etc/bind/zones/db.ios.mu";
    };

    Here we specify the location of our zone database file. Next, we are going to create it and add our host names, our IP and our IPv6 addresses.

    $ sudo nano /etc/bind/zones/db.ios.mu

    $ORIGIN .
    $TTL 259200     ; 3 days
    ios.mu                  IN SOA  ios.mu. hostmaster.ios.mu. (
                                    2014031101 ; serial
                                    28800      ; refresh (8 hours)
                                    7200       ; retry (2 hours)
                                    604800     ; expire (1 week)
                                    86400      ; minimum (1 day)
                                    )
                            NS      server.ios.mu.
    $ORIGIN ios.mu.
    server                  A       192.168.1.2
    server                  AAAA    2001:db8:bad:a55::2
    client1                 A       192.168.1.3
    client1                 AAAA    2001:db8:bad:a55::3
    client2                 A       192.168.1.4
    client2                 AAAA    2001:db8:bad:a55::4

    With a couple of machines in place, it’s time to reload that new configuration.

    Note: Each time you are going to change your zone databases you have to modify the serial information, too. Named loads the plain text zone definitions and converts them into an internal, indexed binary format to improve lookup performance. If you forget to change your serial then named will not use the new records from the text file but the indexed ones. Or you have to flush the index and force a reload of the zone.

    This can be done easily by either restarting the named:

    $ sudo service bind9 restart

    or by reloading the configuration file using the name server control utility – rndc:

    $ sudo rndc reconfig

    Check your log files for any error messages and whether the new zone database has been accepted. Next, we are going to resolve a host name trying to get its IPv6 address like so:

    $ host -t aaaa server.ios.mu. 2001:db8:bad:a55::2
    Using domain server:
    Name: 2001:db8:bad:a55::2
    Address: 2001:db8:bad:a55::2#53
    Aliases:

    server.ios.mu has IPv6 address 2001:db8:bad:a55::2

    Looks good.

    Alternatively, you could have just ping’d the system as well using the ping6 command instead of the regular ping:

    $ ping6 server
    PING server(2001:db8:bad:a55::2) 56 data bytes
    64 bytes from 2001:db8:bad:a55::2: icmp_seq=1 ttl=64 time=0.615 ms
    64 bytes from 2001:db8:bad:a55::2: icmp_seq=2 ttl=64 time=0.407 ms
    ^C
    --- ios1 ping statistics ---
    2 packets transmitted, 2 received, 0% packet loss, time 1001ms
    rtt min/avg/max/mdev = 0.407/0.511/0.615/0.104 ms

    That also looks promising to me. How about your configuration?

    Next, it might be interesting to extend the range of available services on the network. One essential service would be to have web sites at hand.